Microsoft Cloud Adoption Framework for Azure Terraform edition, helps you deploy resources on Azure in a structured way, it come with various components that you can leverage together or you can pick based on where you are on the cloud journey and based on your needs.
Today we are going to review how to contribute to the Cloud Adoption Framework for Azure Terraform module Open Source project.
The CAF module
Almost a year ago we switched to a one-module approach that allows high speed of evolution (we know how time-consuming it is to update a set of small modules). We have implemented that with conditional submodules feature introduced in Terraform 0.13 and we have been running that way up to Terraform 1.0.0 with excellent feedbacks.
Having one single module makes the development more difficult for the developer, as it requires working on the iterative structures and junction between the different objects – One could argue this is the job of anyone trying to put more than two Terraform modules together. On the other hand, having the single module integrated allows composition and configuration way faster for the DevOps engineers and architects putting together a configuration.
This module can be leveraged from any Terraform code via the Terraform registry, using the following syntax:
module "caf" {
  source  = "aztfmod/caf/azurerm"
  version = "5.3.11"
  # insert the 6 required variables here
}
You can find many examples on the module GitHub repository here.
The power of the community
With the speed of evolution of Terraform and the Azure provider, inner-sourcing components for enterprises is a pragmatic option that allows DevOps engineers to focus on delivering value.
Adding a new capability
Let’s say you are reviewing the CAF module capabilities and realise it’s missing a feature, and you want to write it and contribute to the community.
We will do that with a simple example: someone in the community opened an issue for Azure Dedicated Hosts, which allows you to deploy a dedicated Hypervisor for your Virtual Machines. You can find all the details about it here:

Basically we will create two objects:
- the hosts groups: a set of machines in a particular region with a set of capabilities like availability sones and fault domains:
- the hosts: the hypervisor itself, which will be hosting the Virtual Machines.
And we can foresee that we will need to change the virtual machines module capabilities to declare that a particular VM will be deployed on a dedicated host.
The toolset
In order to get things started, I will get the following development environment:
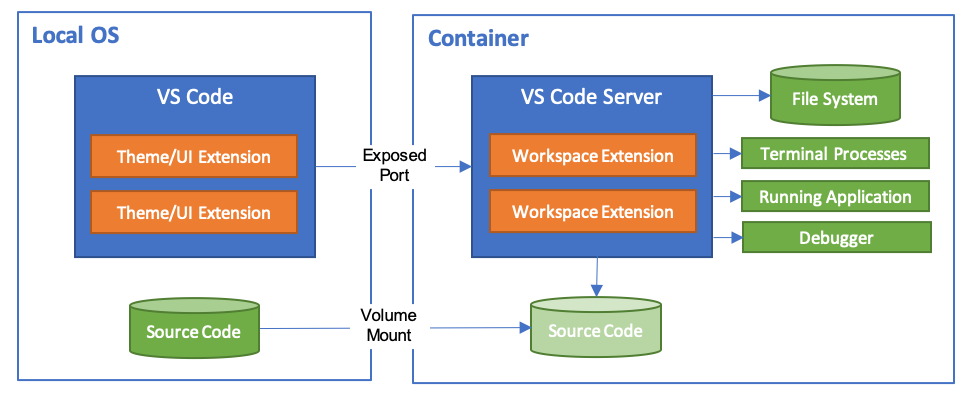
- GitHub Codespace
- Codespace allows me to develop directly off my browser. I can fork the repo, then I don’t even need to clone it locally. Since the module has a
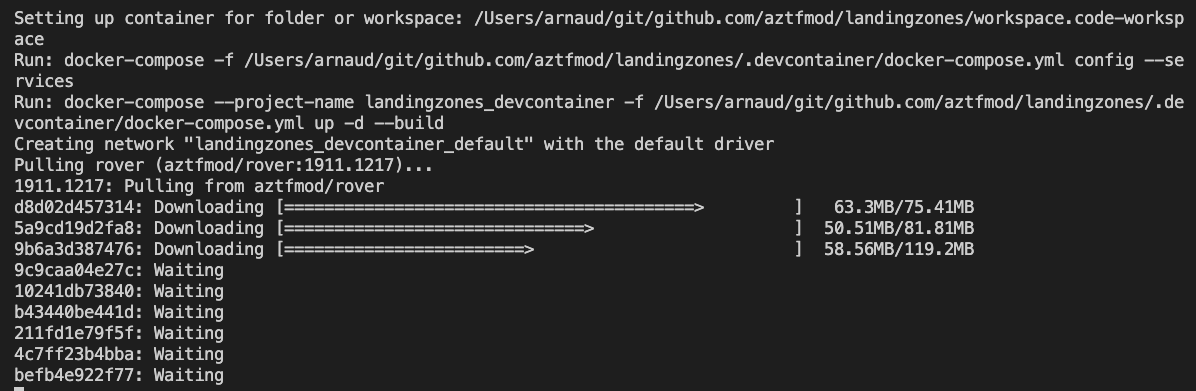
.devcontainerit will pick the right version of development environment plus the development tools I need.
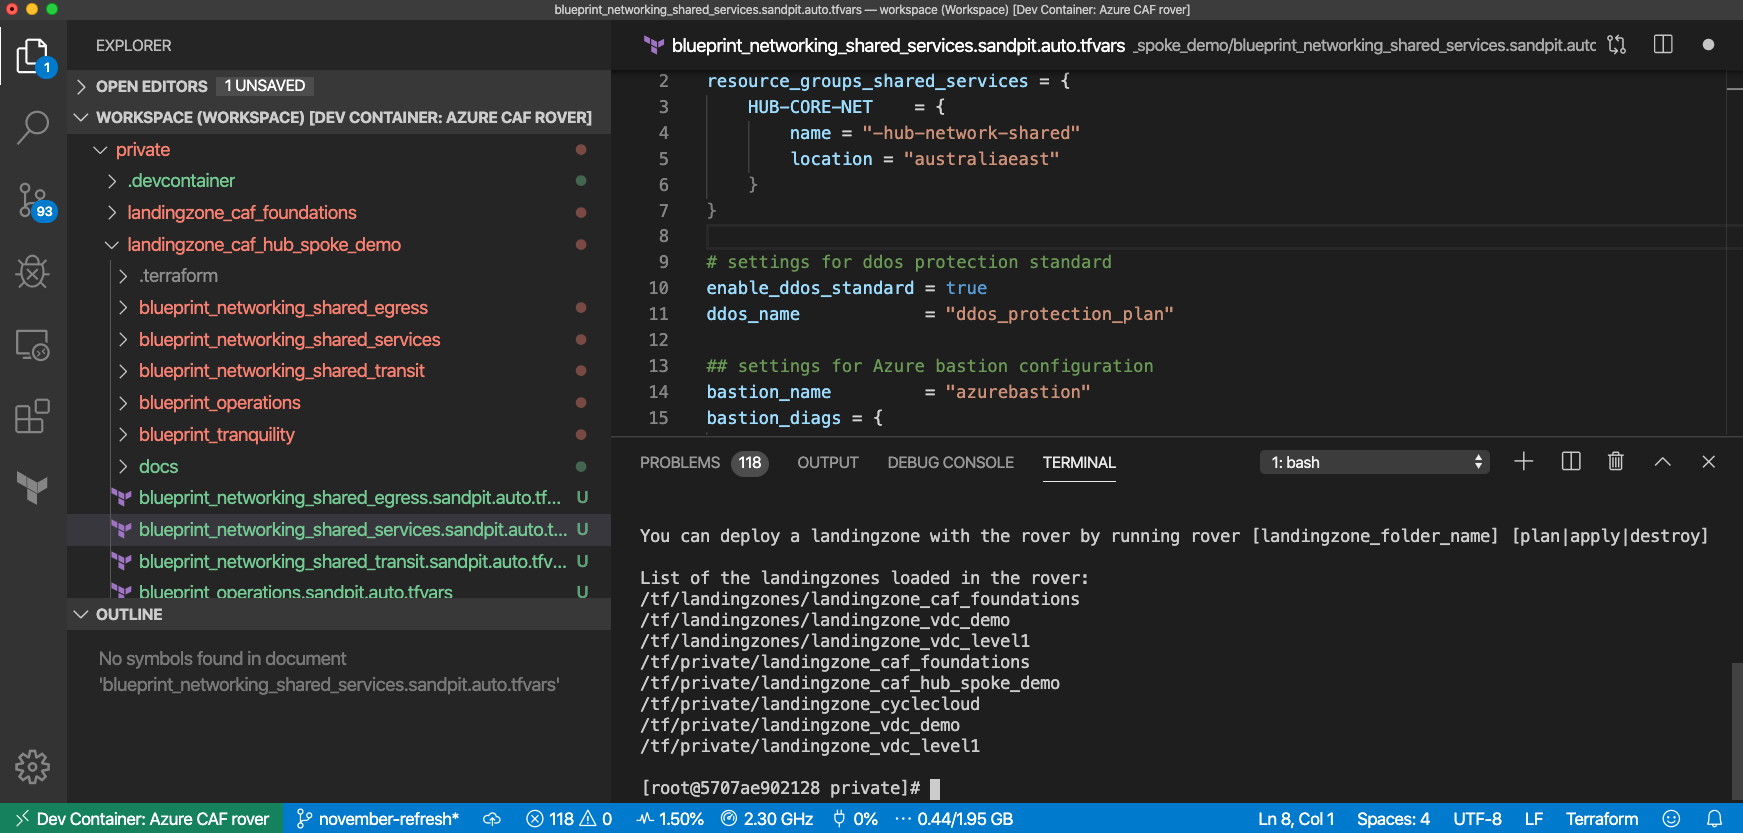
I could also clone the project it and then open it locally into Visual Studio Code, the same development environment would have been created.
- Codespace allows me to develop directly off my browser. I can fork the repo, then I don’t even need to clone it locally. Since the module has a
- Terraform documentation
- For Azure Dedicated Host, I browse off the Terraform registry and find the following related components:
- Azure subscription
- You can get started for free here: https://azure.microsoft.com/en-us/free/
Aligning all side-by-side, and lets go for the coding!
For the rest, let’s do it in a video – full screen required :):
Refactoring and dependencies
It’s very rare that we get things right from the beginning, so after a review, I detect that I can improve the following ones:
Object syntax for the VM
In my initial implementation, I did the following syntax to reference the Dedicated Host to my virtual machine:
 dedicated_host_group = {
        dedicated_host_group_key = "dh1"
        # lz_key = "remoteLZKey"
        # id = "full resource ID"
    }
But I actually don’t the need group but the host, so I refactor the object and standardize on our pattern that allow using the object from:
- resource ID of the object deployed outside of this module
- key of an object deployed locally
- key of an object from another landing zone (via the lz_key attribute)
  dedicated_host = {
        key = "dh1"
        # lz_key = "remoteLZKey"
        # id = "full resource ID"
    }
Composition patterns to retrieve the Dedicated VM dedicated
At first the pattern to locate the dedicated host_id in the VM object was the following:
dedicated_host_id = try(try(each.value.dedicated_host_group.id, var.dedicated_hosts[try(each.value.dedicated_host_group.lz_key, var.client_config.landingzone_key)][each.value.dedicated_host_group.dedicated_host_group_key].id), null)
It worked, but did not align with updated patterns that offer better visibility and troubleshooting, so I just updated it into:
dedicated_host_id = try(coalesce(
    try(each.value.dedicated_host.id, null),
    var.dedicated_hosts[try(each.value.dedicated_host.lz_key, var.client_config.landingzone_key)][each.value.dedicated_host.key].id,
    ),
    null
  )
Dependencies
There are also dependencies that I managed in the meantime, like the name convention provider. I checked at the naming reference here.
The CAF Terraform name provider can be found on the Terraform registry here
And we load it this way:
terraform {
  required_providers {
    azurecaf = {
      source  = "aztfmod/azurecaf"
      version = "~> 1.2.0"
    }
}
It was my first PR to the name provider so I was quite surprised of the easiness of contribution, the most complicated part was to find the right regex to match the supported characters for Azure Dedicated Hosts.
You can review the PR here and contribution guide.
Now it’s your turn
Let’s get started! Happy to hear your thoughts and learn from your feedbacks, also if you identify a missing feature and you want to give it a try, lets:
- In the GitHub Issues, verify if there is an Epic covering the module you are describing.
- If the change you are proposing is a sub-feature of an epic, please open an issue describing your changes in details and the reasons for the change with an example.
- On submitting the PR, please mention the Issue related to the PR.
Also before submitting the PR, make sure:
- Make sure you are using the Visual Studio Dev environment with pre-commit hooks effective.
- Matching with coding conventions and common engineering criteria described here.
- Provide examples including the main scenarios the module is supposed to achieve.
- Include integration tests for your examples.
Thanks
Arnaud